How to reset a BLOX to default
Step 1: download the right file
- for Jetson Nano headless, MX1010-1: mfi_mx1010-1_JetPack4.6.1.tar.bz2
- for Jetson Nano touchscreen, MX1010-2: mfi_mx1010-2.tar.bz2
- for Jetson Xavier NX headless, MX1030-1 or MX1030-3: mfi_mx1030-1.tar.bz2
- for Jetson Xavier NX touchscreen, MX1030-2 or MX1030-4: mfi_mx1030-2.tar.bz2
Step 2: unzip the image
$ tar xvjf mfi_mx1010-2.tar.bz2
Step 3: flash the BLOX
Connect the programmer to the BLOX and place the BLOX in programming mode:
Step 3a: remove the comm module cover
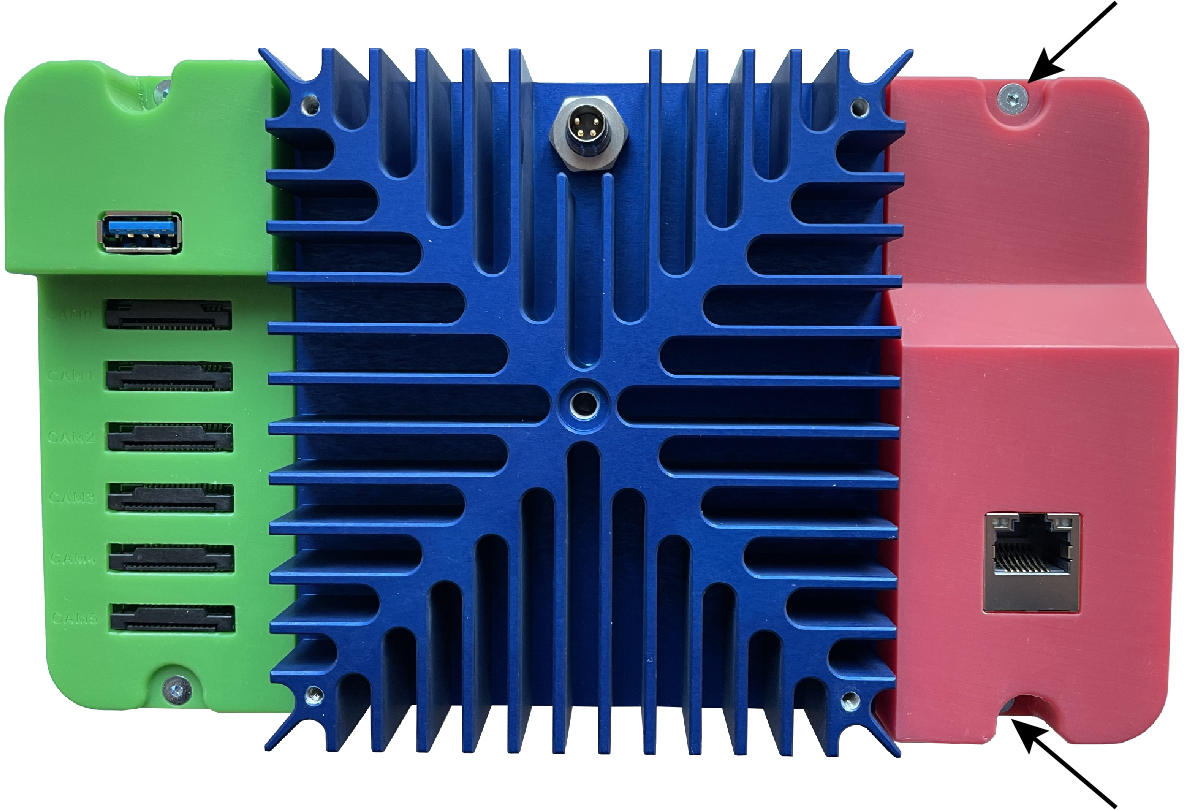
For removing the communication module cover, you need to unscrew the 2 screws as showed below with an alley key.

Step 3b: connect the programmer
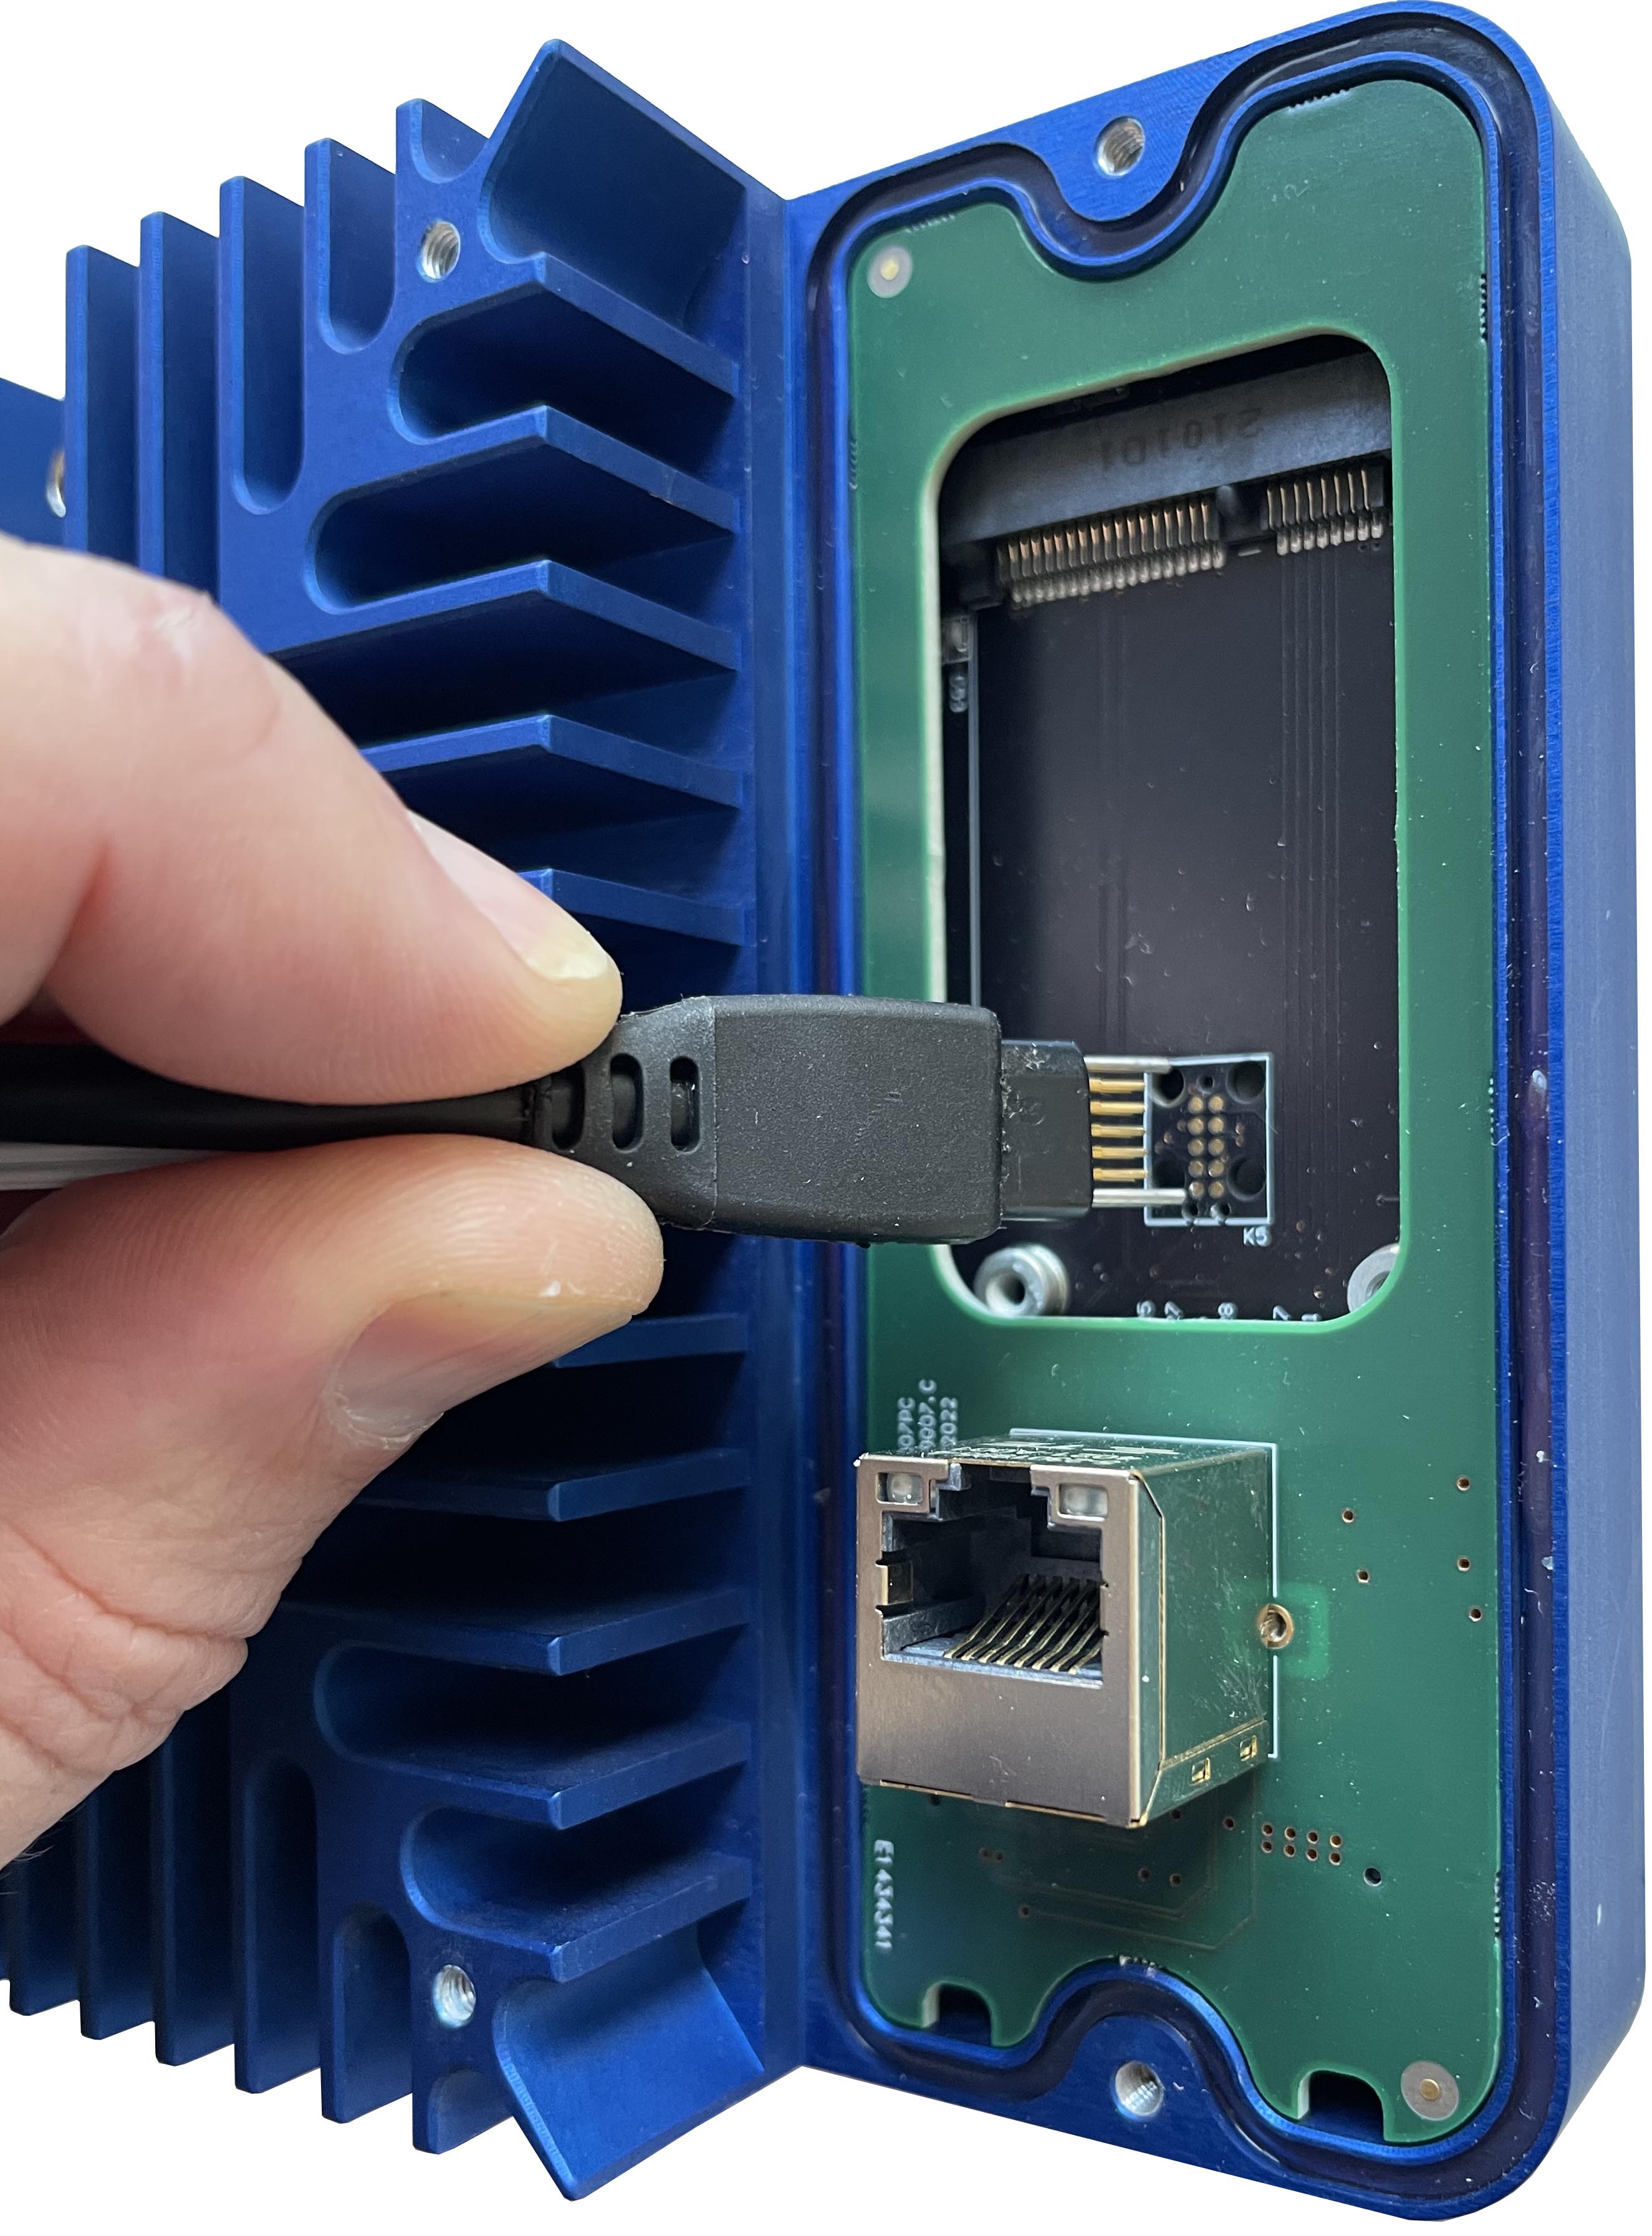
When you have removed the comm module cover, you will see the programming connector on the motherboard. Here you need to plug the programming connector as showed in the image below. Make sure you plug the guiding pins in the right holes. (2 pins at tho bottom, 1 pin at the top)

Step 3c: place the BLOX in program mode.
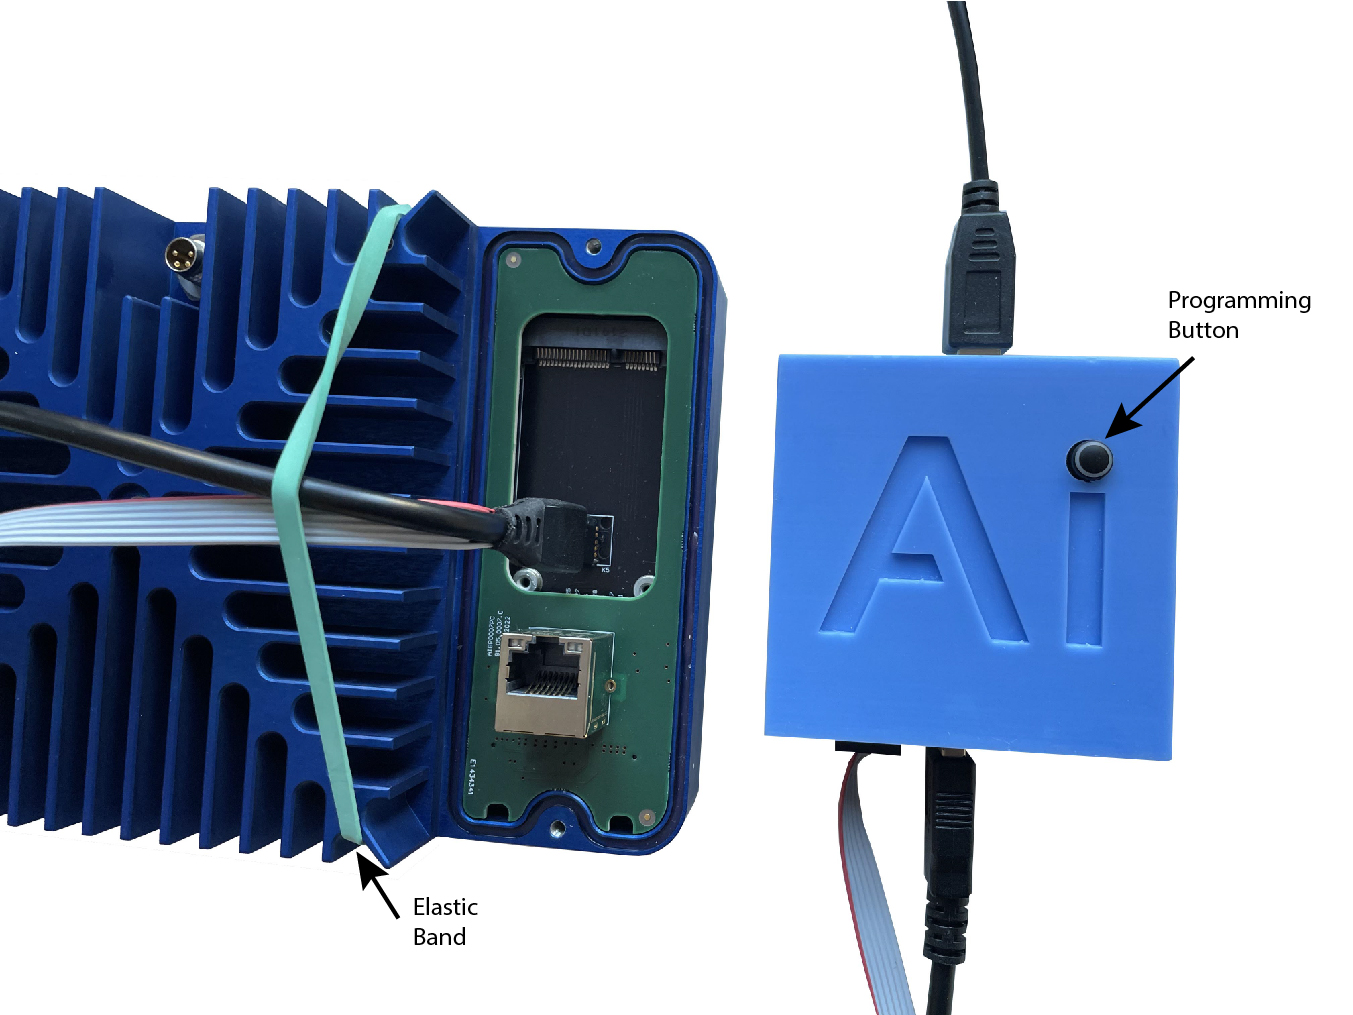
To place the BLOX in programming mode, you need to push the programming button while powering the device. Once the power is on, you can release the programming button.
To make sure the programming connector stay at his place during programming. You could use an elastic band as showed below.

Step 3d: Flash the blox
You can flash the BLOX with:
$ cd mfi_mx1010-2
$ sudo ./nvmflash.sh
To follow the programming of the BLOX, you can open a serial console to the BLOX:
$ sudo screen /dev/ttyUSB0 115200
Step 4: flash the uSDCard
There are 3 options to flash the uSDCard:
- from the programming computer local, when you can remove the uSDCard out of the the BLOX
- from the programming computer remotely, when you don’t have physical access to the BLOX. (slowest)
- through an usb stick, when you can’t remove the uSDCard but have physical access to the BLOX
Option 1
Plug the uSDCard in a local sdcard reader and execute the following steps:
# to find the sd card
$ lsblk
sda           8:0    1  29,1G  0 disk
├─sda1        8:1    1     1K  0 part
├─sda5        8:5    1    16G  0 part
└─sda6        8:6    1  13,1G  0 part

# in our case the sd card is on /dev/sda
# incase the sd card partition our mounted, you need to unmount them
$ umount /dev/sda5
$ umount /dev/sda6

# now you can flash the device sd card with
$ sudo dd if=sdc_mx1010-2.img of=/dev/sda bs=4M status=progress
When the usdcard is flashed, plug the card back into the BLOX and reboot the BLOX.
Option 2
TODO
Option 3
This is almost the same as option 1, the only difference is that you need to copy the sdc_mx1010-2.img to an usb stick. Plug the stick afterwards in the BLOX device and execute following steps:
# login into the BLOX remotely, where xxx.xxx.xxx.xxx is the IP address of the BLOX:
$ ssh ai-blox@xxx.xxx.xxx.xxx
ai-blox@tegra-ubuntu:~$
# check if the SD card is mounted:
ai-blox@tegra-ubuntu:~$ lsblk
mmcblk1      179:128  0  29.1G  0 disk
├─mmcblk1p1  179:129  0     1K  0 part
├─mmcblk1p5  179:133  0  14.9G  0 part /mnt/mmcblk1p5
└─mmcblk1p6  179:134  0  14.2G  0 part /mnt/mmcblk1p6

# umount the drives in case they are mounted:
ai-blox@tegra-ubuntu:~$ sudo umount /dev/mmcblk1p5
ai-blox@tegra-ubuntu:~$ sudo umount /dev/mmcblk1p6

# plug the USB stick in an usb-port and check where the stick is mounted:
ai-blox@tegra-ubuntu:~$ lsblk
sda            8:0    1  28.7G  0 disk
└─sda1         8:1    1  28.7G  0 part /media/ai-blox/aeb8767c-9cfb-4f76-a6fd-e4f62922c043

# you can now flash the sdcard:
ai-blox@tegra-ubuntu:~$ sudo dd if=/media/ai-blox/aeb8767c-9cfb-4f76-a6fd-e4f62922c043/sdc_mx1010-2.img of=/dev/sda bs=4M status=progress
6463422464 bytes (6.5 GB, 6.0 GiB) copied, 671 s, 9.6 MB/s
1542+0 records in
1542+0 records out
6467616768 bytes (6.5 GB, 6.0 GiB) copied, 671.854 s, 9.6 MB/s

# reboot the device
ai-blox@tegra-ubuntu:~$ sudo reboot