Connect to your Blox
The steps below explain how to retreive the IP address of your Blox and connect to it over ssh and VNC.
Step 1: Connect the Ai-Blox programmer & Ethernet
Before powering on the Blox, the programmer needs to be connected. The connection pads on the PCB can be found underneath the communication module.
Remove the red cover of the communication module
For removing the communication module cover, you need to unscrew the 2 screws as showed below with an alley key. 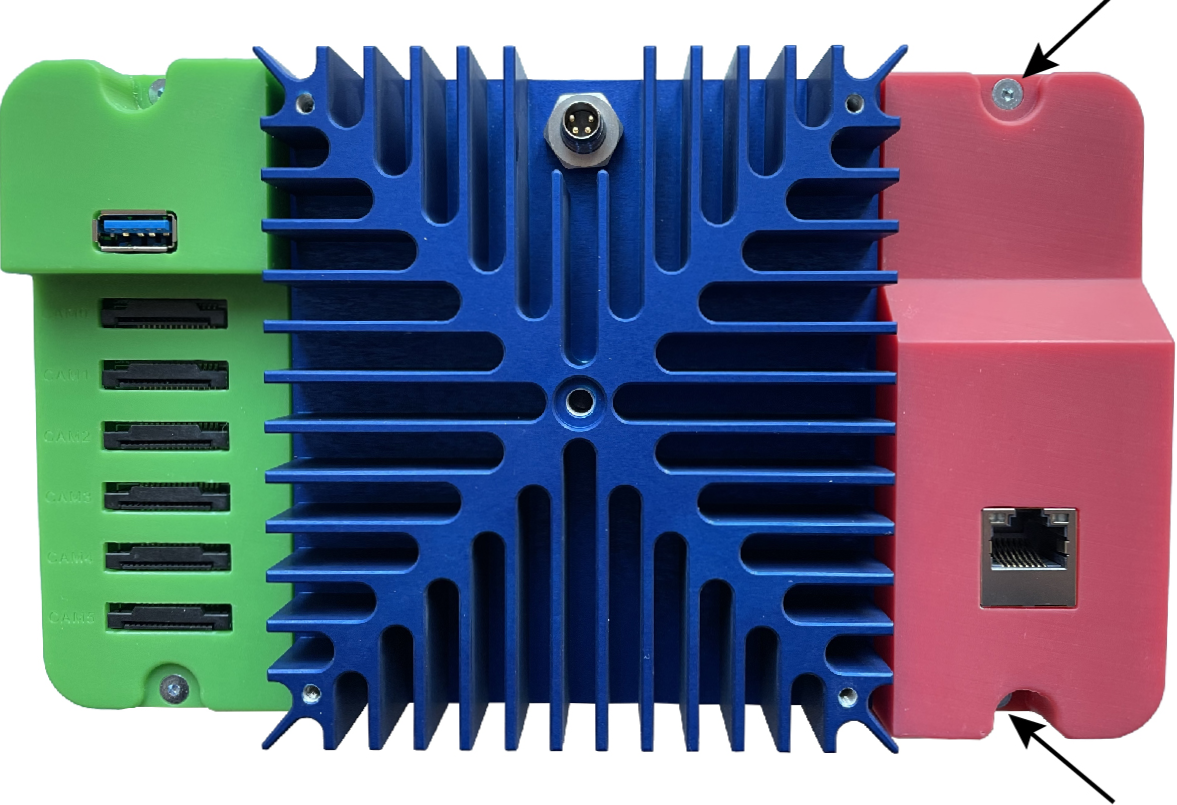
If there is a WiFi or LTE modem mounted, you will have to unscrew this also and takeout the modem module.
Connect the Programmer
On the black board is a 5x2 pad configuration, which is the connector for the programmer tag connector. There are 3 small holes, 1 above and 2 below that mark the orientation of the connector. The tag connector has metalic colored pins that need to fit in these 3 holes. Make sure to hold it in the right orentation. When placed correctly, give it a soft push, the metalic pins will sink into the board and the golden pins need to touch the pads. To make sure, you will need to an elastic band over keep the golden pins puhsed down to the pads.
Below is the connector orientation. 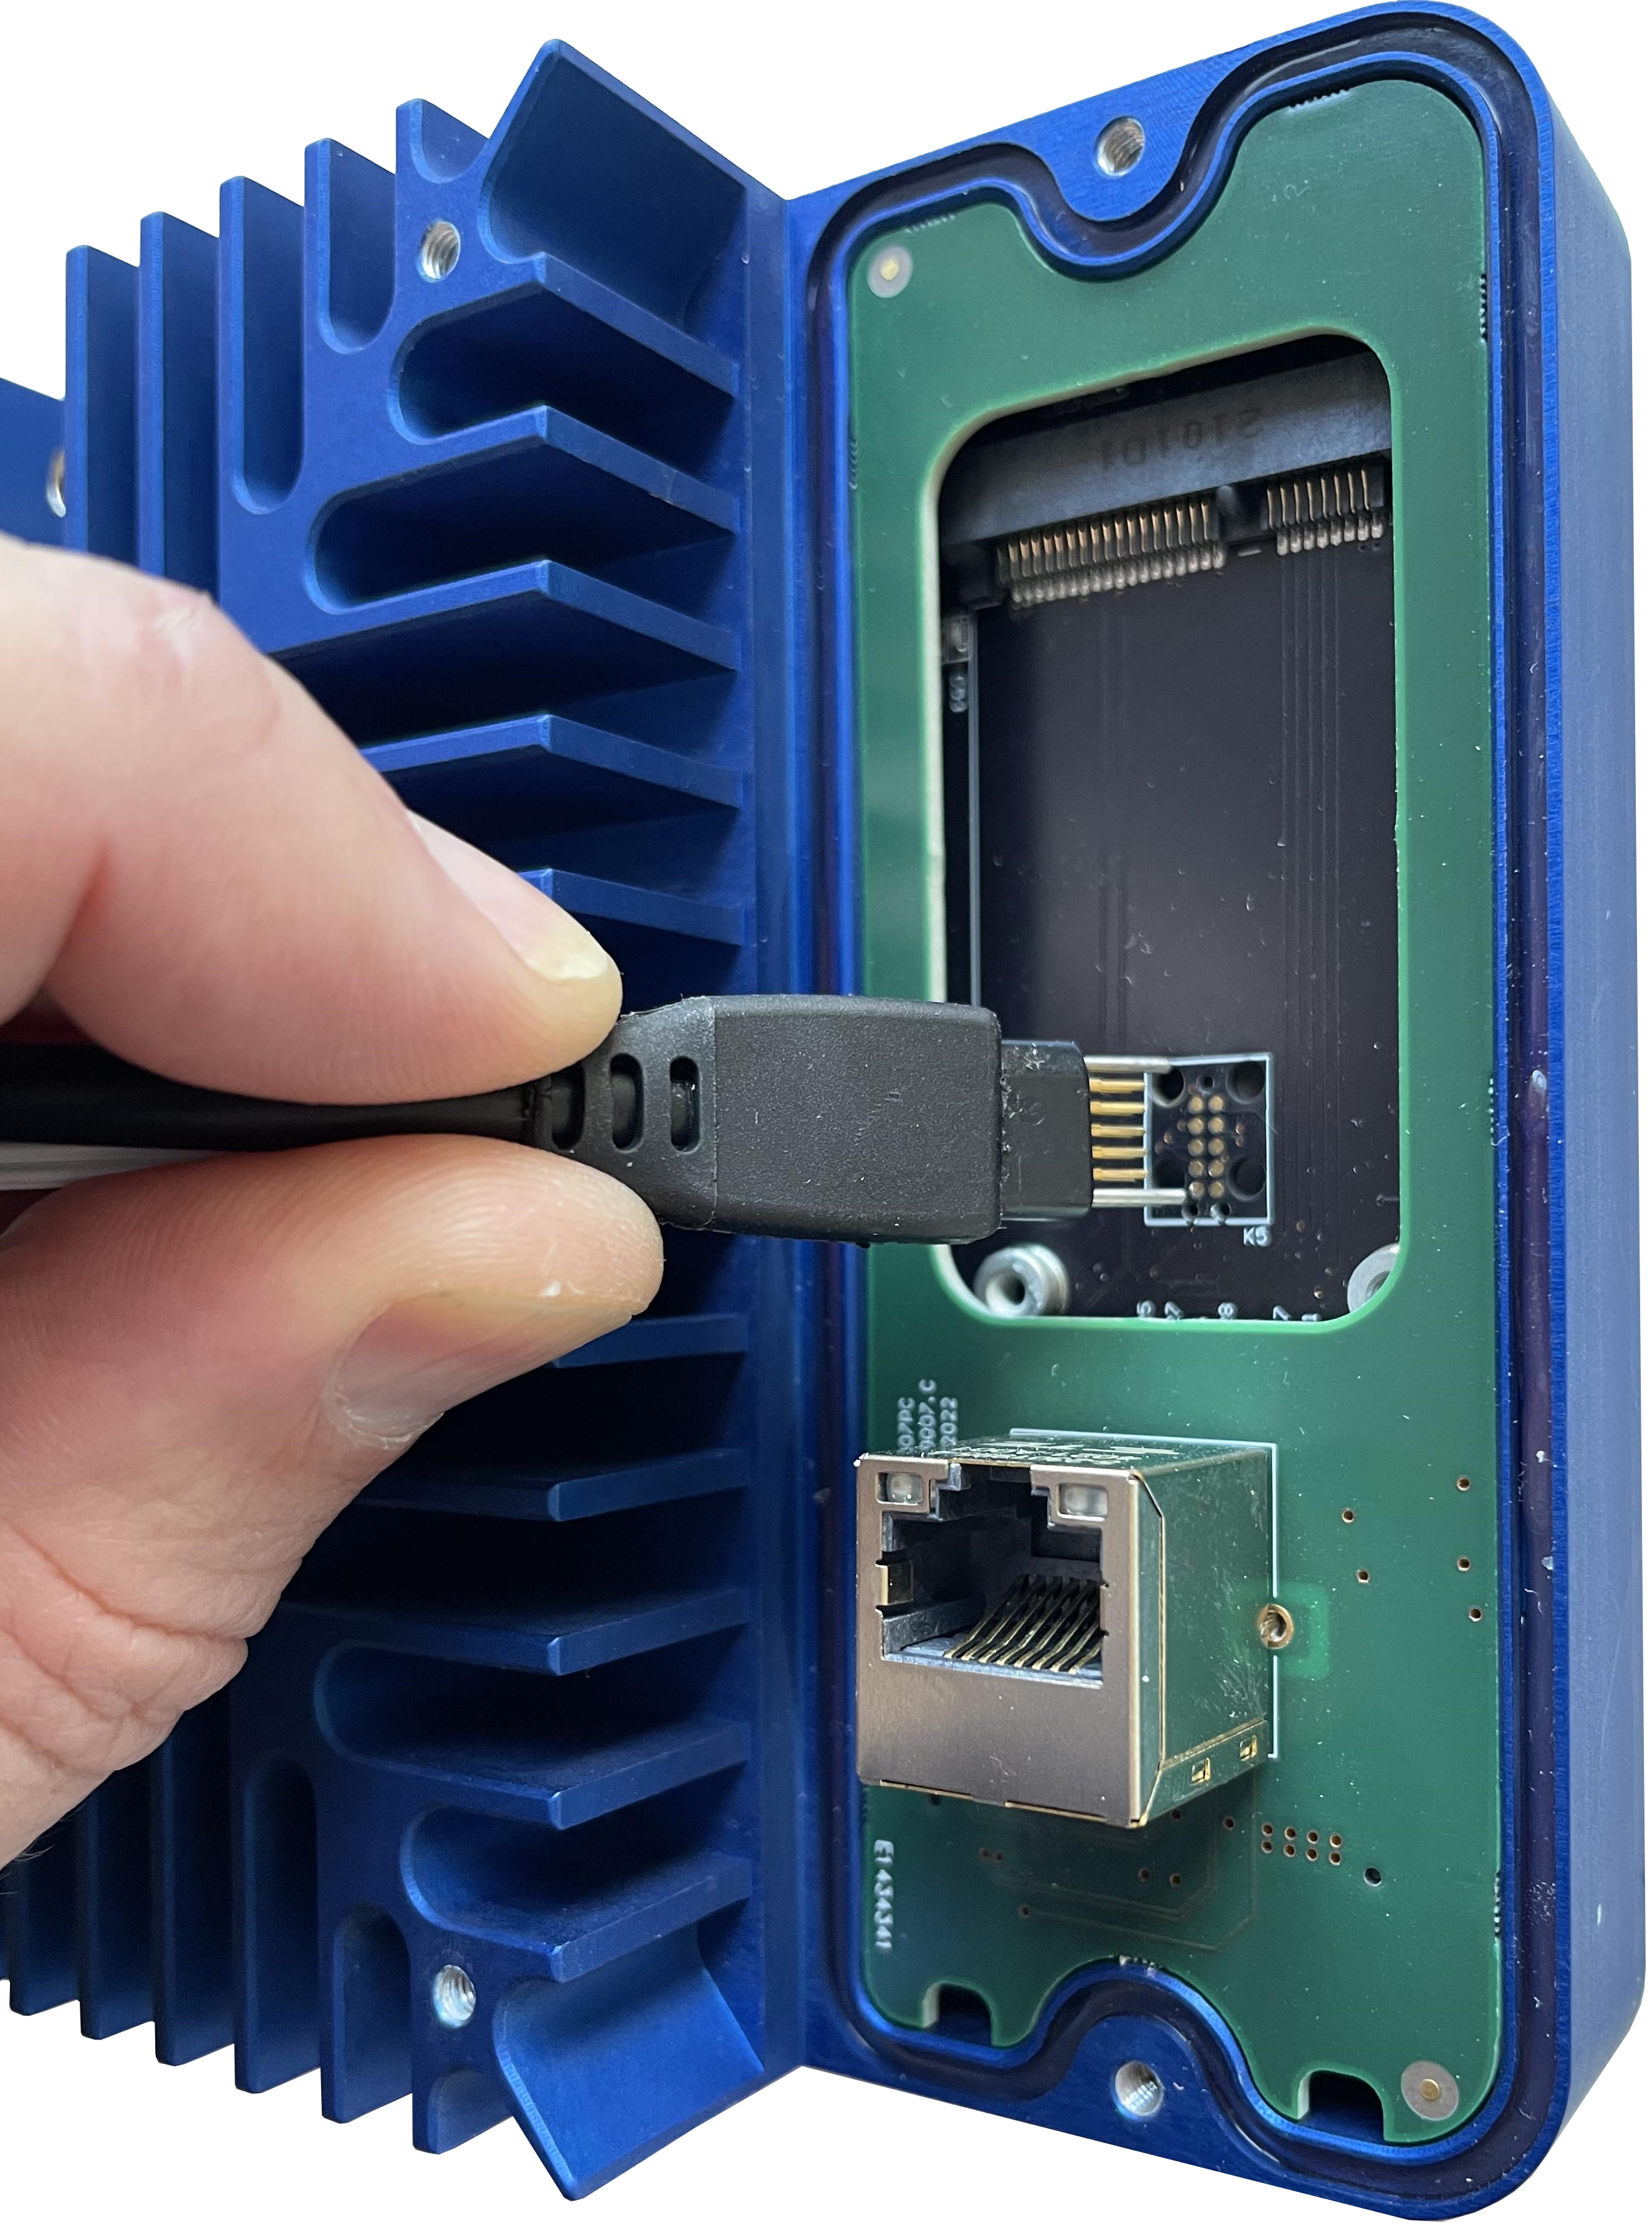
Blox programmer connector is kept in place with an elastic band. 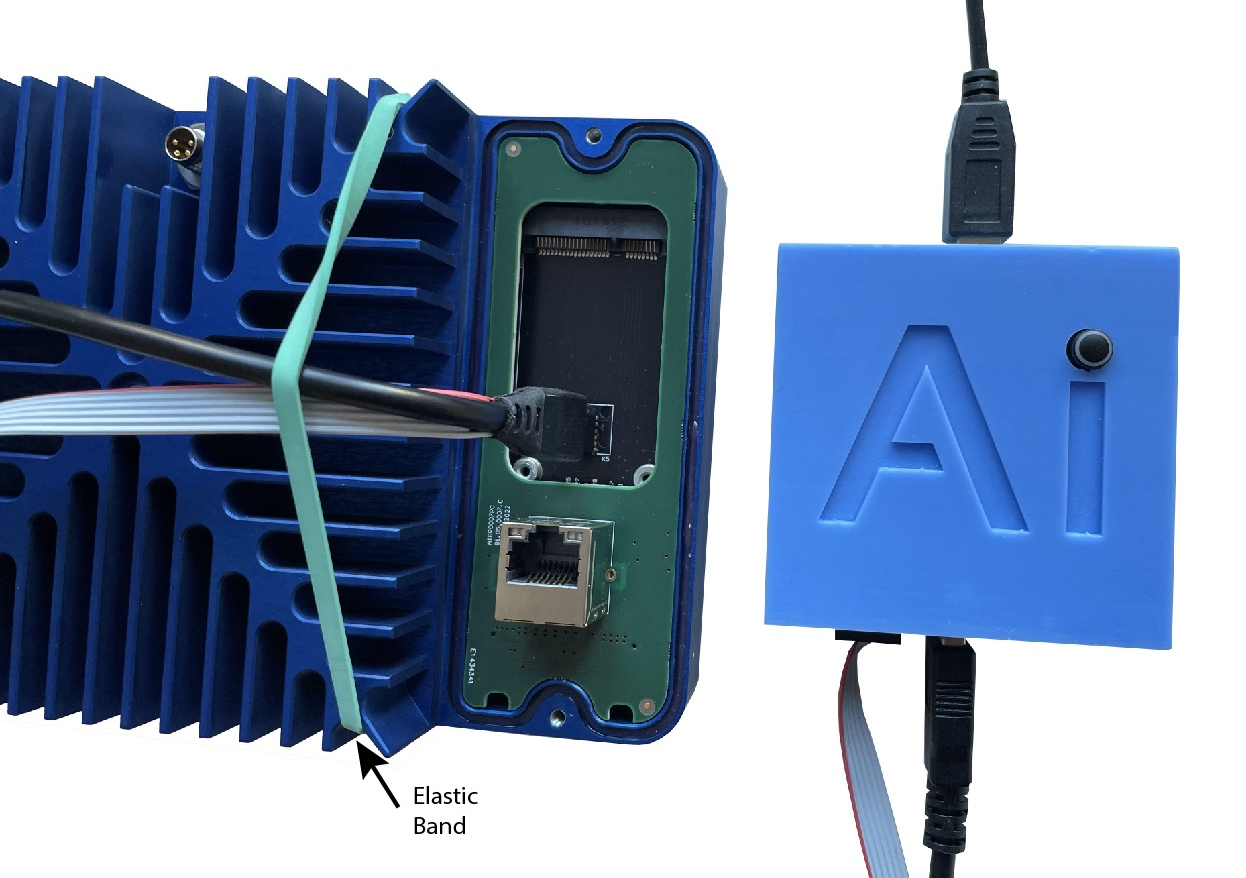
Now you also need to connect the programmer USB-A to USB-B connector to your computer.
Connect the Ethernet Cable
To gain an IP address, connect an Ethernet cable to the RJ45 of the communcation module.
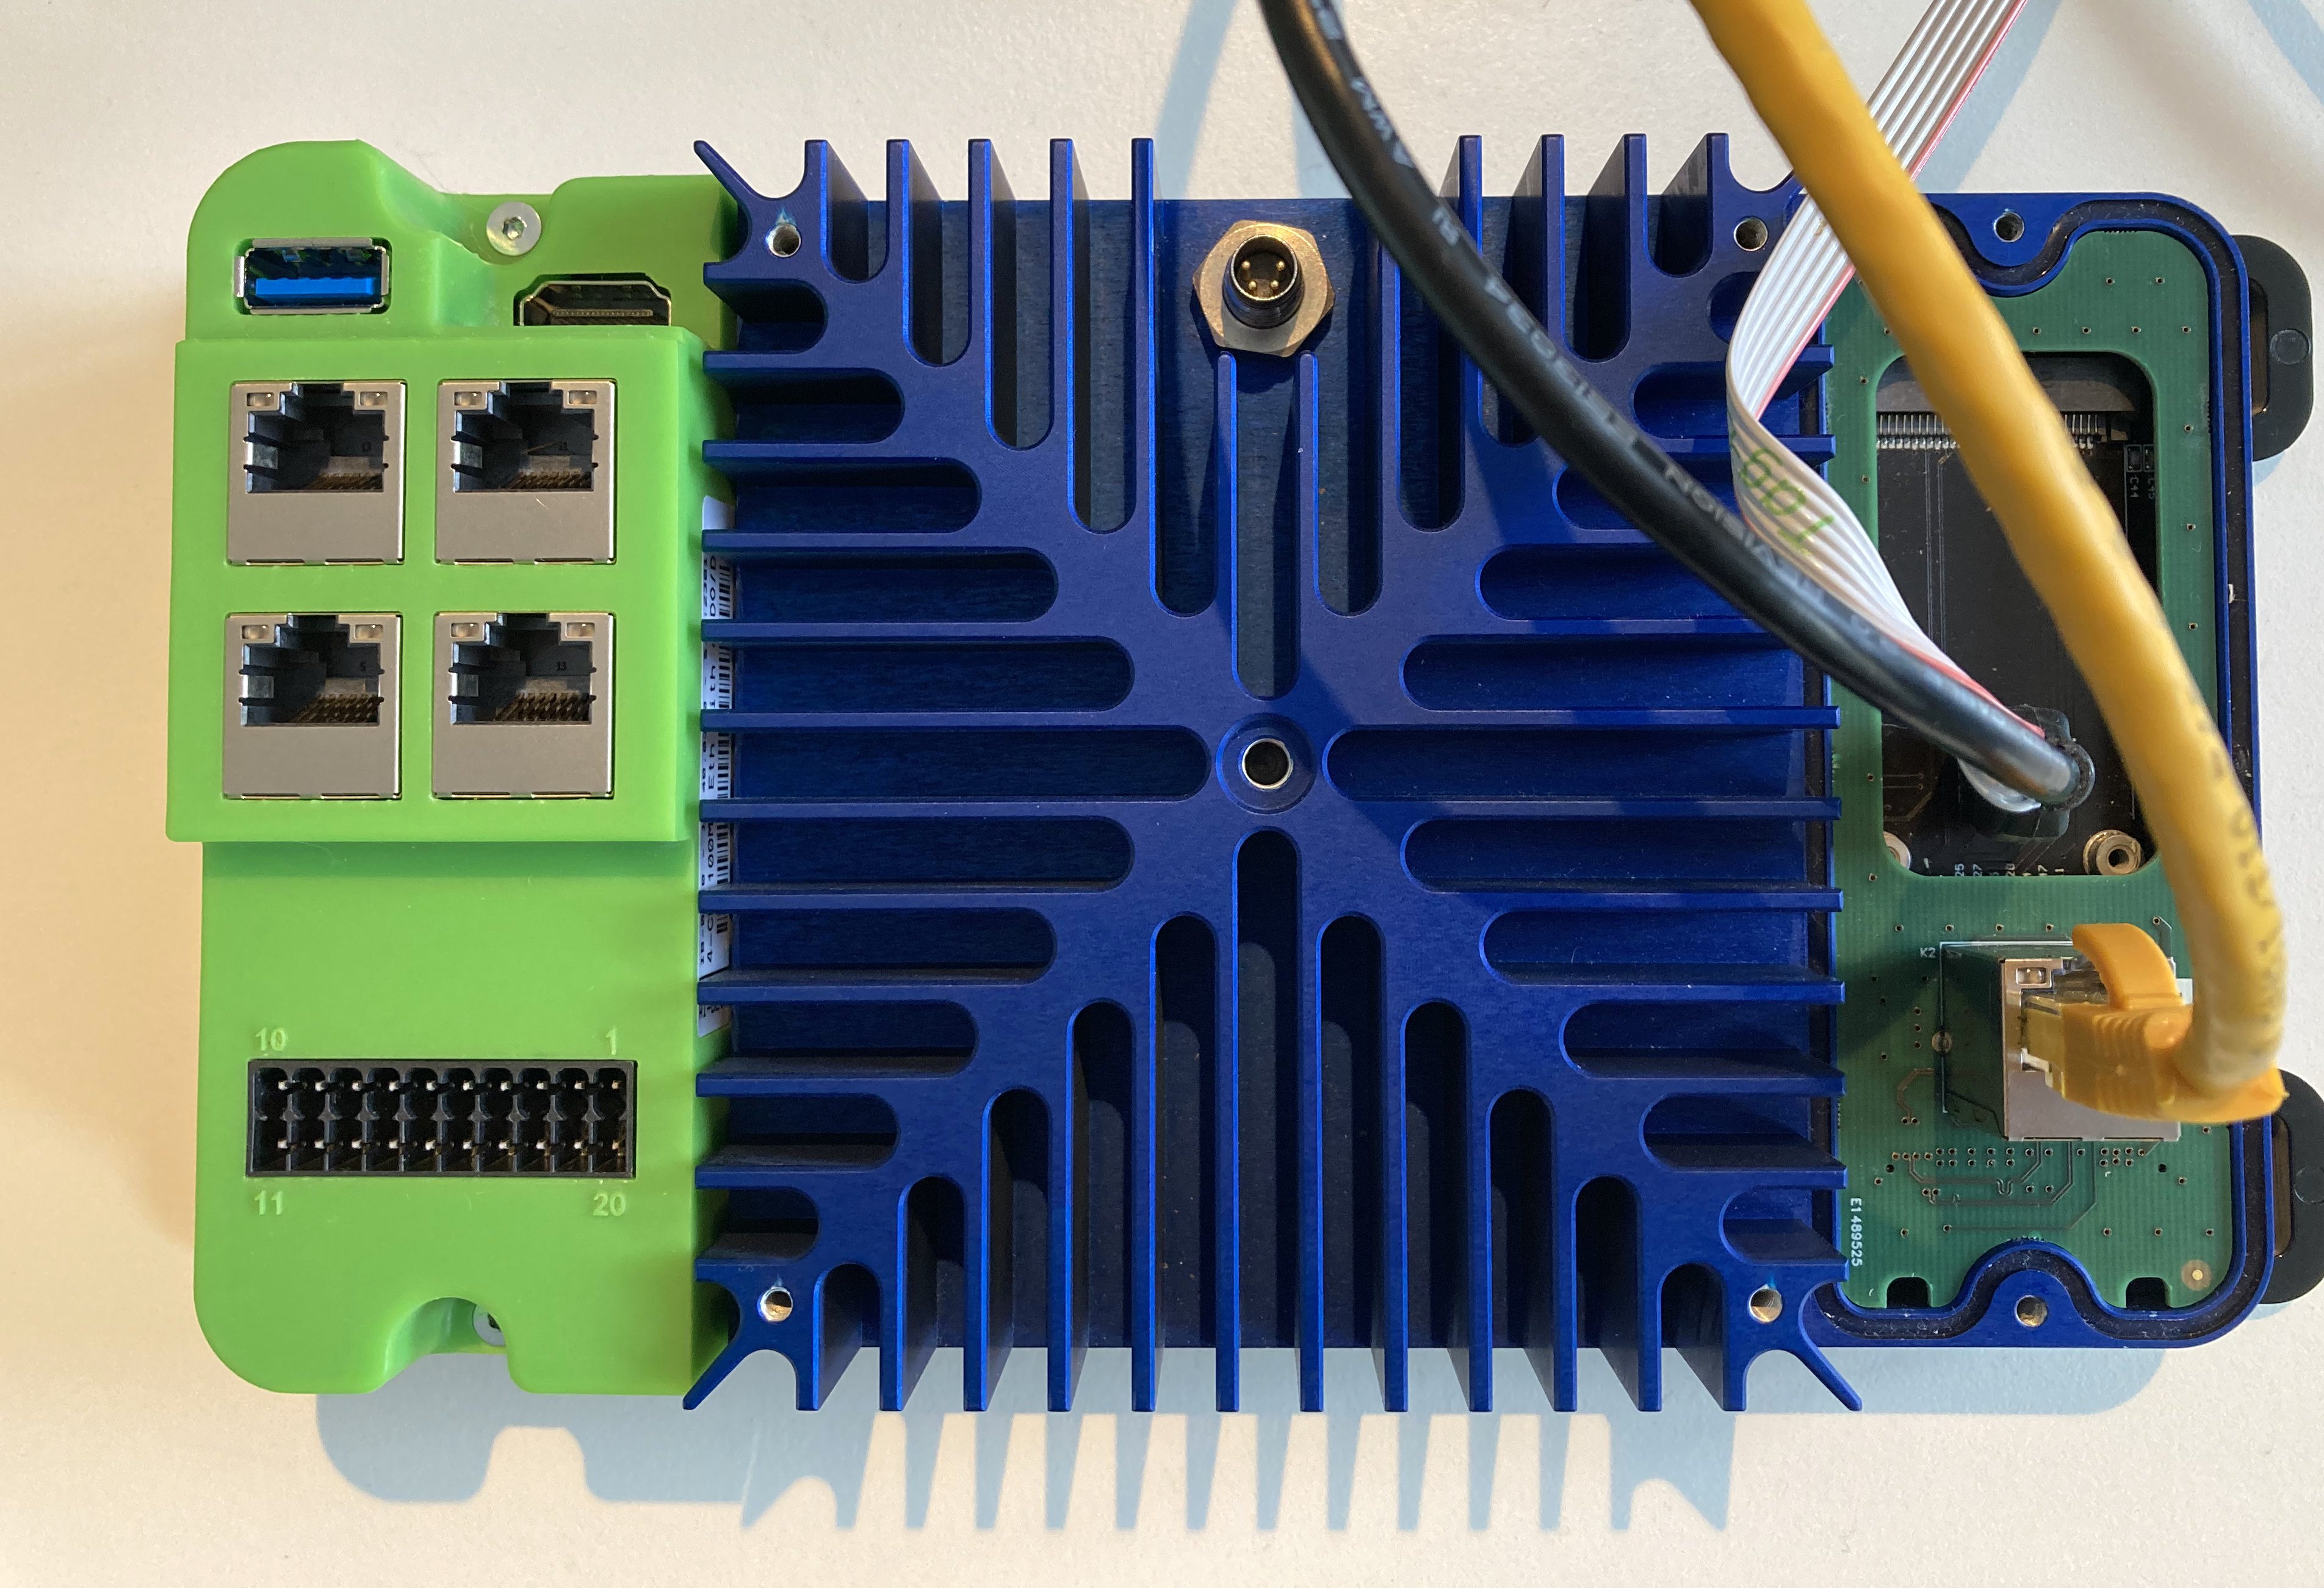
If your blox device has the CB-0310 (4 PoE Ethernet) green communication module, note that these are not configured by default to receive a dynamic IP address. Do not use these ports to conenct to your network.
Step 2: Setup the serial connection
The Blox Programmer device contains a USB to Serial Port Bridge and can be used to connect to the serial console of the Blox platform.
Ubuntu
Connect the programmer’s USB cable to your computer. Connect the tag connector the Blox.
Find the serial port on your computer
$ ls /dev/tty*
The serial port will appear as ttyUSBx in the above command output. If it is the only USB to serial convertor connected to your computer it will be listed as ttyUSB0.
Start the serial connection
To use the serial connection you will use the screen command. If you are not sure if screen is installed on your computer, you can always test with following command.
$ screen -v
If the output from the above command is Command 'screen' not found, you will need to install screen, otherwise you can skip this step.
$ sudo apt install screen
Start the serial port
$ sudo screen /dev/ttyUSB0 115200
The console screen will be cleared.
Windows
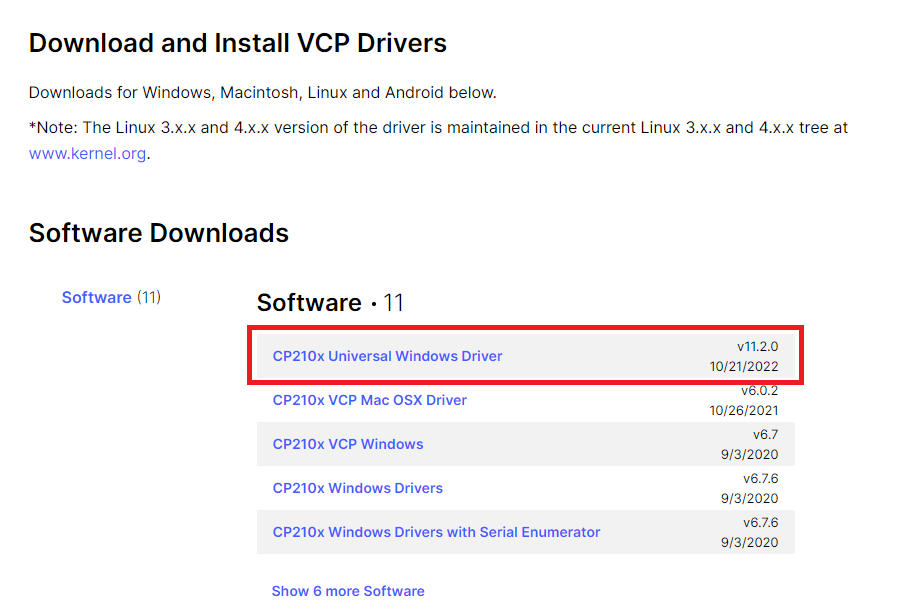
To use the USB to UART Bridge of the programmer on Windows, the Silicon Labs CP2010x Universal Driver needs to be installed.
Download the CP210x Universal Windows driver
Once the driver download is finished and the programmer is connected to your laptop, go to device manager. Under other device, the CP2102N USB to UART Bridge Controller will appear.
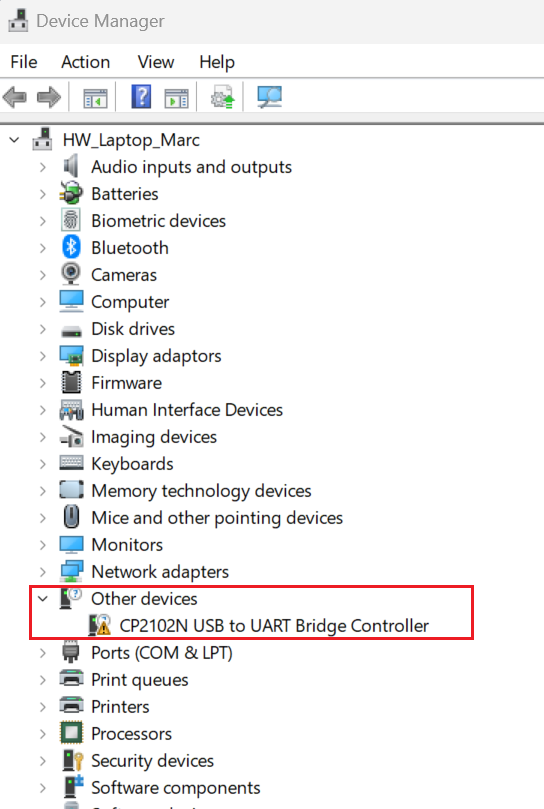
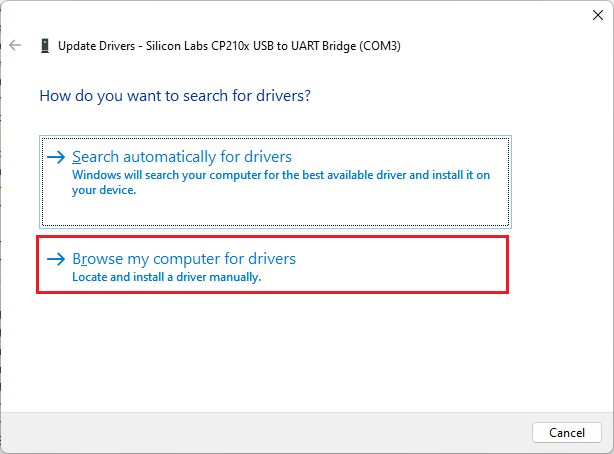
Now right click and select update driver.

Manually browse to the folder where you have downloaded the driver and select it.
Once the driver is installed, the programmer will appear as Silicon Labs CP210x USB to UART Bridge

Now you can use this COM port number in Putty to start the serial connection. Select the COMx as displayed in the Device Manager and set the Speed to 115200.
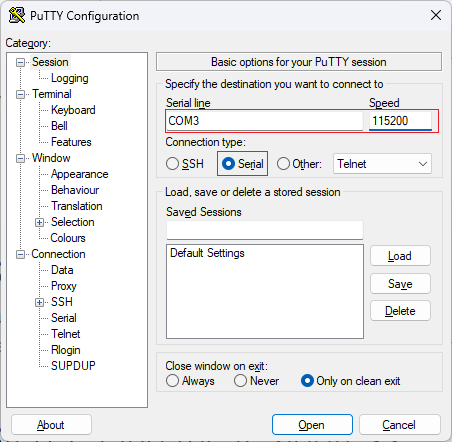
Click on open to start the serial connection.
Step 3: Power on
Now the serial port is opened, plug in the Power supply connector.
From the moment the blox is powered, the boot log will appear in the terminal screen. Boot time is around 30s. The boot log will stop to ask you to login.
Ubuntu 18.04.6 LTS tegra-ubuntu ttyTCU0
tegra-ubuntu login:
Now login with ai-blox
Password:
Password is ai-blox
On successful login the information and prompt will appear.
Last login: Tue Apr 11 13:33:46 UTC 2023 on ttyTCU0
Welcome to Ubuntu 18.04.6 LTS (GNU/Linux 4.9.253+ aarch64)

 * Documentation:  https://help.ubuntu.com
 * Management:     https://landscape.canonical.com
 * Support:        https://ubuntu.com/advantage
This system has been minimized by removing packages and content that are
not required on a system that users do not log into.

To restore this content, you can run the 'unminimize' command.

305 updates can be applied immediately.
260 of these updates are standard security updates.
To see these additional updates run: apt list --upgradable

ai-blox@tegra-ubuntu:~$
Step 4: Find the IP address
To find the IP address use the ifconfig | grep inet in the serial console. The IP address will appear on the second line of the output of the command.
ai-blox@tegra-ubuntu:~$ ifconfig | grep inet
        inet 172.17.0.1  netmask 255.255.0.0  broadcast 172.17.255.255
        inet 192.168.1.53  netmask 255.255.255.0  broadcast 192.168.1.255
Step 5: Connect through SSH
Now the IP address is known, we can connect on the network over SSH.
Ubuntu
$ ssh ai-blox@xx.xx.xx.xx
Where the xx.xx.xx.xx is the IP address retrieved in the previous step and the user will be ai-blox
On the first time connection, you will have to answer yes in the console on question regarding the certificate.
Login with the password ai-blox
Windows
If you click on Putty you can start a new SSH session

Login with username: ai-blox and password ai-blox.
Step 6: Connect with a VNC client
A VNC server is also enabled on the Blox device and can be used to connect with a VNC client. On Ubuntu you could use the Remote Desktop Viewer (Vinagre) which is installed by defalt. Windows users could install and use (RemoteRipple)[https://remoteripple.com/] or any other availbel VNC client.
To use the VNC client, use the known IP address, login: ai-blox and password ai-blox
Recommendations
To enhance security you will need to change the default password as a minimum. If you have changed the password, make sure that you have stored it somewhere to retrieve it later on.
ai-blox@tegra-ubuntu:~$ passwd
Changing password for ai-blox.
(current) UNIX password:
Enter new UNIX password:
Retype new UNIX password:
passwd: password updated successfully
How to find you Blox’s IP address on your LAN network
To identify your Blox’s IP address on your LAN network, you could use nmp (networkmapper) or the arp protocol.
Ubuntu
$ sudo nmap -sn 192.168.1.0/24
The Blox will be represented as tegra-ubuntu
Windows
> arp -a